
Written by Elaine
Edited on
12 March 2024
·
16:01
How do you install the BlueBuilt Nexum Pro Wireless Mouse?
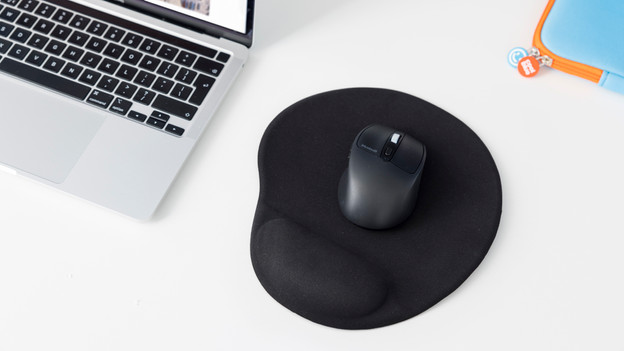
You want to connect your new BlueBuilt Nexum Pro Wireless Mouse to your laptop or desktop. In this article, you can read how to do this in 4 steps.
Set up BlueBuilt mouse in 4 steps
Read how to install your BlueBuilt mouse in 4 steps here.
- Step 1. Connect the mouse
- Step 2. Set the DPI
- Step 3. Navigate between pages
- Step 4. Charge the mouse
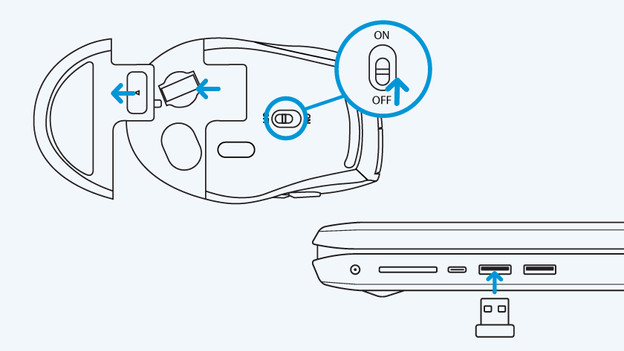
Step 1: connect the mouse
- Slide the on/off switch on the bottom of the mouse to 'On'. The mouse is now on.
- The included USB receiver is located inside the mouse. Slide the cover on the bottom out of the mouse and remove the receiver.
- Plug the USB receiver into a USB-A port on your laptop or desktop. The mouse will now connect to your laptop.
- Isn't the mouse working? Try a different USB-A port.
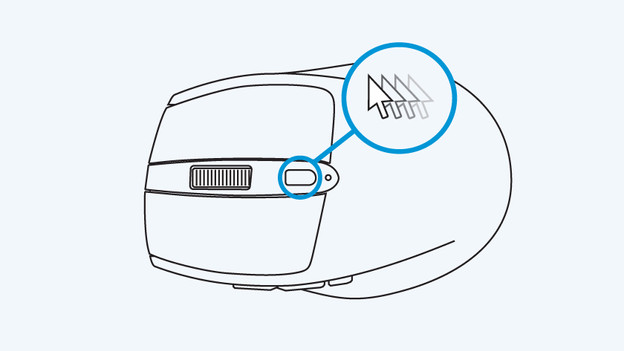
Step 2: set the DPI
Adjust the cursor sensitivity of your mouse with the button after the scroll wheel. Press it and test the mouse. Is it still too slow? Keep pressing it until you reach the desired speed. Is it too fast? Press the button until it starts slowing down. This mouse has 3 speed settings: slow, medium, and fast.
Your BlueBuilt Nexum Pro Wireless Mouse is now ready for use.
Note: if you haven't used the mouse for 10 minutes, it switches to the standby mode. Press one of the buttons on the mouse to activate it again.
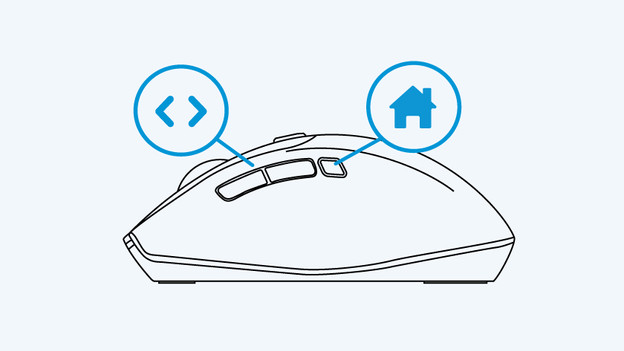
Step 3: navigate between pages
The mouse has 3 extra buttons on the left side. With the first buttons, you can navigate between the different pages in your web browser quickly and easily. Want to go back to the previous page? Press the rear button. Want to go back to the page you were on? Press the front button. The third button is the 'Home' button. With the touch of this button, you go back to your homepage.
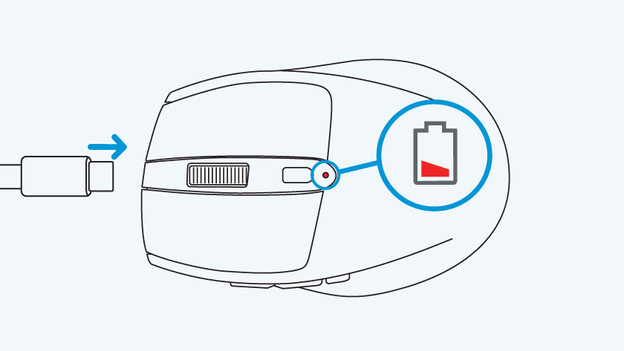
Step 4: charge the mouse
Is the light on top of the mouse flashing red? The battery is empty. You can charge the mouse with the included USB-C to USB-C cable. Plug this into the USB-C port of your device. You can also charge it with a USB charger via the socket.

